8. Publishing a Report
Publishing a Report in Report Designer
To share a report from the Pentaho server, it has to be available in the Pentaho solution repository. There are two ways to get the report to the server. The first is to publish the report directly to the Pentaho server using the File > Publish to Server menu option; (optionally, click the Publish to Server icon ( ![]() ) in the Report Designer toolbar or press <CTRL>+<SHIFT>+P). The other way is to manually generate the files using the File > Publish... menu option and copy them to a folder under the server's pentaho-solution folder. The files generated by both menu options are the Pentaho Reporting XML definition (.xml) containing the layout/design of the report and the action sequence (.xaction) containing the data source type, data source location, query and the name of the report XML definition. Developers can build advanced functionality like (prompting, bursting, scheduling, and so on) using Pentaho's Design Studio by modifying the action sequence (.xaction).
) in the Report Designer toolbar or press <CTRL>+<SHIFT>+P). The other way is to manually generate the files using the File > Publish... menu option and copy them to a folder under the server's pentaho-solution folder. The files generated by both menu options are the Pentaho Reporting XML definition (.xml) containing the layout/design of the report and the action sequence (.xaction) containing the data source type, data source location, query and the name of the report XML definition. Developers can build advanced functionality like (prompting, bursting, scheduling, and so on) using Pentaho's Design Studio by modifying the action sequence (.xaction).
To switch the report's JDBC data source connection to a connection (JNDI) defined on the Pentaho server, enable the option to Use Server Data Source. For the report to run on the Pentaho server, the data source name used in the Report Designer must match the connection (JNDI) name specified on the Pentaho server.
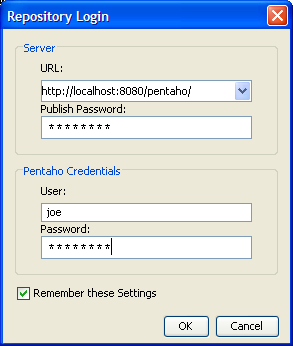
You must provide the system's publish password, which is located in publisher_config.xml in pentaho-solutions/system, and valid Pentaho user credentials (User ID and Password).
If you are publishing against the open source server must enter the server's publish password only, which is located in publisher_config.xml in pentaho-solutions/system. You do not need to enter user ID or password when publishing to an open source server as there is no additional security. When publishing to the BI server you must supply a valid user ID, password, and system publish password.
Designating the Publish Report Location
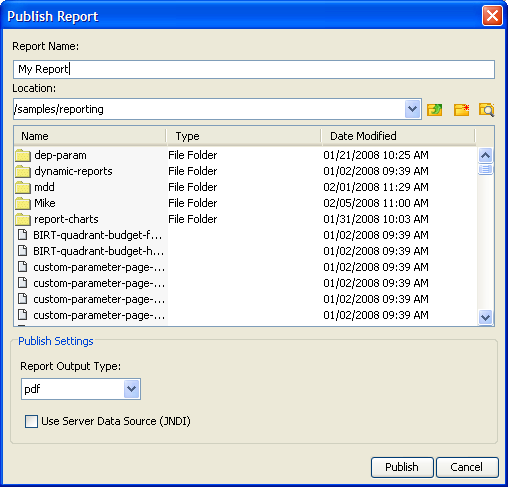
The Publish Report feature allows you to browse through the solution repository to find the most appropriate location for your report. Click the Publish to Server icon ( ![]() ) in the Report Designer toolbar or press <CTRL>+<SHIFT>+P to open the Publish Report dialog box. To access the Publish Report dialog box, you must log on to the Pentaho server.
) in the Report Designer toolbar or press <CTRL>+<SHIFT>+P to open the Publish Report dialog box. To access the Publish Report dialog box, you must log on to the Pentaho server.
After logging on, find an appropriate location to publish your report. Enter the report name in the Report Name field and click Publish.
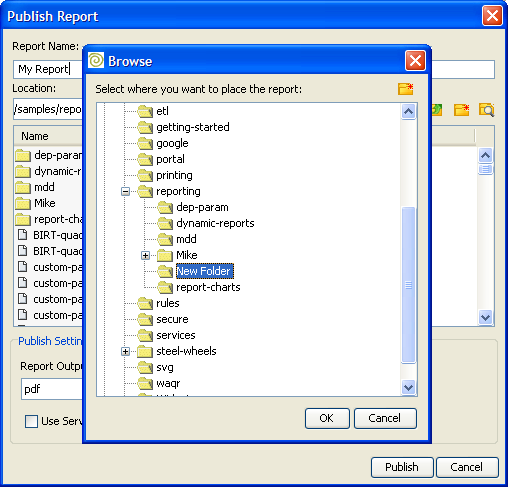
If you are not sure where to publish the report, click the browse button to display a tree view of the entire solution repository.
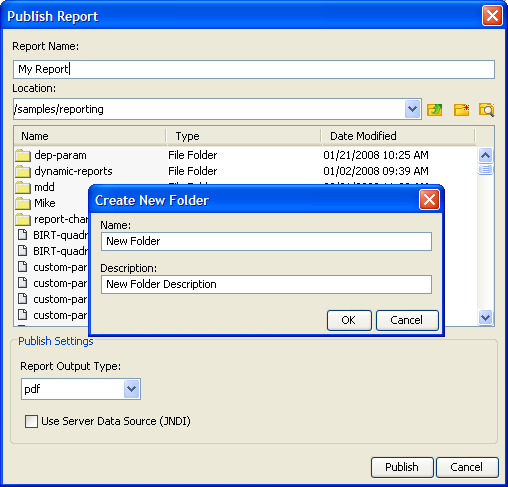
If necessary, you can create a new folder in the Solution Repository as shown in the sample below.
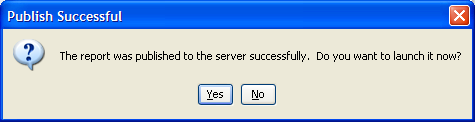
Once the report is successfully published to the server you are prompted to view the report on the server. This allows you to verify that the report runs correctly in your deployment.
Allowing Report Users to Enter Parameters
Sometimes you want to enable users of your report to enter parameters that narrow the scope of the report before it runs. That way, users can examine report data that is of specific interest to them. Follow the instructions below to enable users to enter parameters:
- Start the Pentaho BI Platform.
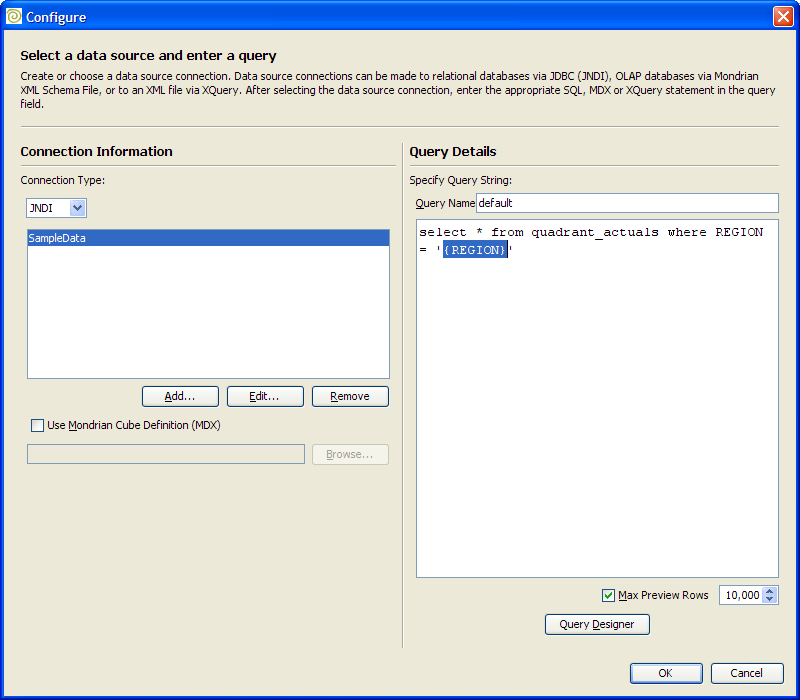
- In the Report Designer Configure page, under Query Details, enter the parameter name in braces. In the sample below, REGION is the parameter name. For example, the user can examine data associated with the central, western, northern, or eastern regions.
- Publish the report. During the publish process, Report Designer acknowledges the parameter name and produces the action sequence that prompt the user for a parameter.
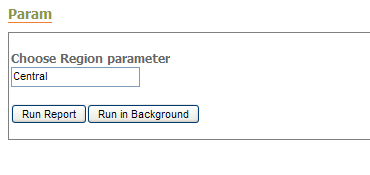
- In the BI Platform, prepare to run the report. Notice that the entry, (REGION), in the Report Designer Query Details page prompts the user to enter a parameter for the report. In the example below, the user has entered, "Central," to view all report data associated with the Central region.
See also: http://wiki.pentaho.org/display/Reporting/Creating+a+Data+Source+for+Tomcat