Designing Reports With MySQL and JNDI
May 4, 2006
Contributed by Lee Mewshaw, Red Hat
This technical article covers how to design a report using the Pentaho Report Design Wizard that uses MySQL as the source for the report's data and using JNDI to access the MySQL datasource. In addition I will cover the steps needed to publish the report to the Pentaho Pre-Configured Install (our demo, referred to as the PCI), utilizing the same JNDI connections.
Resources Before You Get Started
Before you dive in, be sure you have the following resources. I've listed the version numbers I used when sanity-testing the accuracy of the article, but it may be possible to swap in later versions without error. Of course, I haven't tested those versions, so you are on your own if they do fail ![]()
- Pentaho Pre-Configured Install, version 1.1.5 build 260 or later
- Pentaho Getting Started Guide, version 1.1.5 build 260 or later
- Pentaho Report Design Wizard, version 1.1.5 build 180 or later
- Pentaho Report Design Wizard User's Guide, version 1.1.5 build 180 or later
- MySQL Server, version 5.0.21 Community Edition
- MySQL Connector/J, JDBC Driver for MySQL, version 3.1.2
- You should have a populated MySQL database that you want to build your report against. I used the Pentaho Data Integration tool (aka KETTLE) to move the PCI's SampleData tables from Hypersonic over to MySQL. Using Pentaho ETL, this was a simple and straight forward task. The rest of this article will be based on a report I build against the Pentaho PCI's sample data.
Step-By-Step: How to Build Your Report Using MySQL and JNDI
- The first step should be to install MySQL and build your database. There is plenty of documentation on the MySQL web site that can help you there. I will assume for brevity that you have an existing MySQL database that you want to report against.
- Unzip the Pentaho PCI and run through some of the samples, using the Pentaho Getting Started Guide to guide you. You want to be sure that your PCI is functioning so that you can publish your report to the server later. From here forward, I will refer to the root of the PCI as <pci-home>.
- Unzip the Report Design Wizard, using the Pentaho Report Design Wizard Guide as your guide. From here forward, I will refer to the root of the Wizard as <wizard-home>.
- Unzip the MySQL Connector/J package. In the root of the unpacked folders, note that there is a .jar file named "mysql-connector-java-3.1.12-bin.jar".
- Copy the mysql-connector-java-3.1.12-bin.jar to the <pci-home>\jboss\server\default\lib directory.
- Copy the mysql-connector-java-3.1.12-bin.jar to the <wizard-home>\lib\jdbc directory.
- Add the mysql-connector-java-3.1.12-bin.jar to your classpath. For Windows, this would entail changing the ClassPath environment variable under My Computer | Properties | Advanced. On *nix systems, this variable may be found in your .cshrc file. Remember that you must specify the absolute path to the jar when adding it to your classpath.
- Run the Report Design Wizard ( execute the reportwizard.bat|.sh file).
- Choose "Blank Template", then click the Next button.
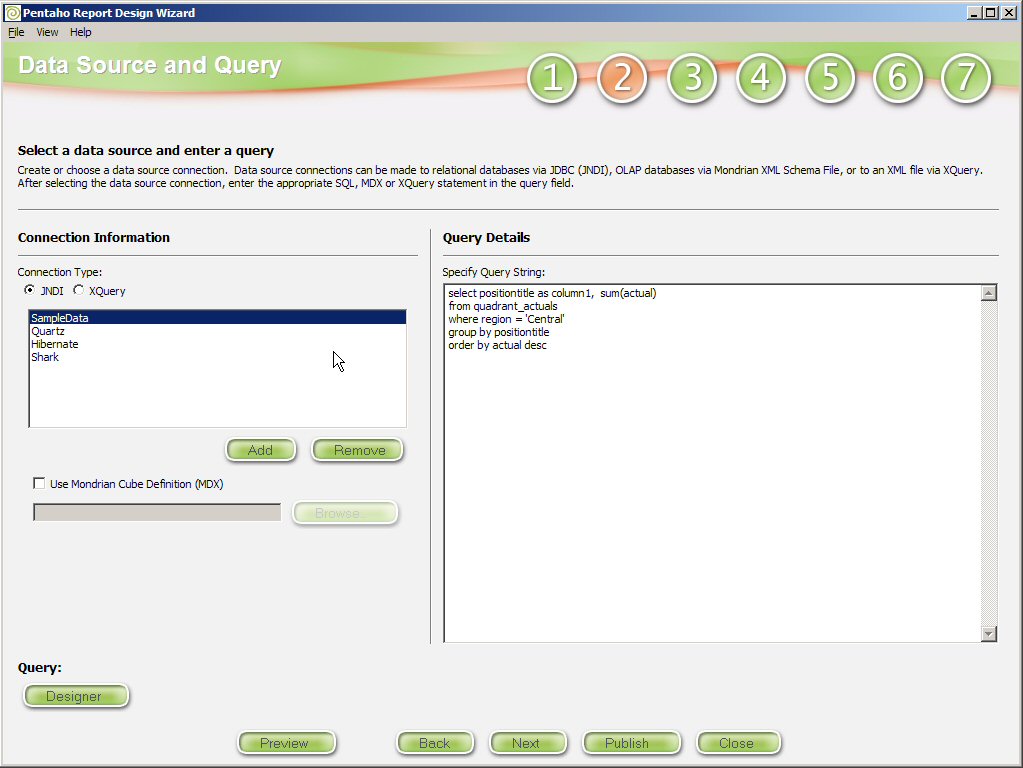
- Choose "JNDI" as the Connection Type, then click the Add button.
- Type in the following information:
- JNDI Name: mysql_db (this can be whatever you want it to be, just REMEMBER what it is. You will be repeating this name in a couple of places, and spelling and CASE matters!
- Driver: com.mysql.jdbc.Driver
- Connect String: jdbc:mysql://localhost:PORT/DATABASE_NAME (You can leave off the port if you are usinig the default 3306, and the database name should be the name of your database. My connect string looks like this: jdbc:mysql://localhost/SampleData.
- User Name: username authorized to read database
- Password: password for authorized user
- On the same step in the wizard, define your query. In my test, I defined an SQL query, my dialog looked similar to the following:
- At this point, you can Preview your report (its that easy!), or you can take advantage of the powerful features in the Report Design Wizard to customize the look and feel of you report. I'll leave that as an exercise for you and a leisurely read of the Pentaho Report Design Wizard User's Guide.
- I suggest at this point that you SAVE your wizard session. While this is not a usual feature in a wizard, it comes in very handy when you want to get back to a step in the wizard to modify datasource connections or report design easily. From the File menu, select Save As. Name your saved session whatever you like. The file will be given an .xreportspec extension.
- When you feel you are done with your report design, click the Publish button. This will publish your report to the <wizard-home>\resources\solutions\samples\reporting directory. Note that this DOES NOT publish your report to the PCI! We will cover those steps shortly. You should see at least three files when your report is published:
- The .xml file is the JFreeReport definition.
- The.xaction file is the action sequence definition that enables the report to be run as part of the Pentaho BI Platform.
- The .properties file that is used to describe the action sequence for the report.
Step-By-Step: How to Publish Your Report to the Pentaho PCI (Running Your Report as Part of a Pentaho BI Solution)
Publishing your report to the PCI is a very simple click of a button. However, In order to run your report in the PCI using your defined JNDI connection, there are a few steps you need to perform to alert JBoss about the aforementioned JNDI connection. The steps for publishing to the PCI and getting your JNDI datasource hooked up properly are outlined here.
- Still in the Report Design Wizard, select from the menu at the top of the wizard File | Publish | To Location...
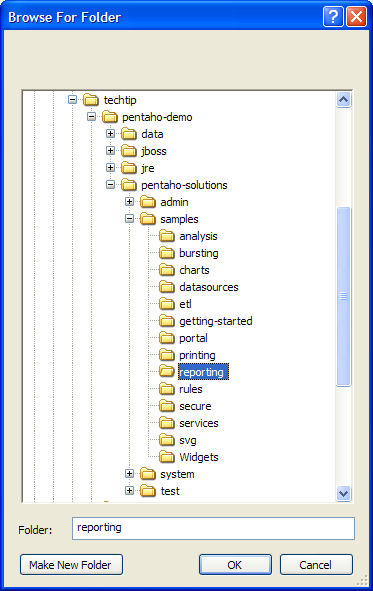
- Publish your report to <pci-home>\pentaho-solutions\samples\reporting. This will build a suitable action sequence for your report, and store all of the generated files in the solutions directory of the PCI.
- Next, modify the pentaho web application configuration files to include our connection info.
- Locate the web.xml file in <pci-home>\jboss\server\default\deploy\pentaho.war\WEB-INF.
- Inside the <webapp></webapp> tags, after the last </resource-ref> tag, add the following:
NOTE that the <res-ref-name> value should match the JNDI name used in the report definition above, preceded by "jdbc/".<resource-ref> <description>mysql_db</description> <res-ref-name>jdbc/mysql_db</res-ref-name> <res-type>javax.sql.DataSource</res-type> <res-auth>Container</res-auth> </resource-ref> - Locate the jboss-web.xml file in <pci-home>\jboss\server\default\deploy\pentaho.war\WEB-INF.
- Inside the <jboss-web></jboss-web> tags, after the last </resource-ref> tag, add the following:
NOTE that the <res-ref-name> value and the <jndi-name> value should include the JNDI name used in the report definition above.<resource-ref> <res-ref-name>jdbc/mysql_db</res-ref-name> <res-type>javax.sql.DataSource</res-type> <jndi-name>java:/mysql_db</jndi-name> </resource-ref>
- Almost done! We need to create a datasource file for jboss to satisfy it's deployment requirements for recognizing our JNDI datasource.
- Create a file named mysql_db-ds.xml file in the <pci-home>\jboss\server\default\deploy directory.
- Place the following XML in your newly created file, tweaked with the values specific to your database:
<?xml version="1.0" encoding="UTF-8"?>
    <datasources>
        <local-tx-datasource>
            <jndi-name>mysql_db</jndi-name>
            <connection-url>jdbc:mysql://localhost/sampledata</connection-url>
            <driver-class>com.mysql.jdbc.Driver</driver-class>
            <user-name>root</user-name>
            <password>password</password>
            <metadata>
                <type-mapping>mySQL</type-mapping>
            </metadata>
        </local-tx-datasource>
    </datasources>
    ...
- Last, stop and restart the PCI. Run the PCI samples, and look for your new report under the Report Samples.