Setting Up Parameters With the Design Studio
May 17, 2006
Submitted by Doug Moran, Pentaho Team Developer
The article this week addresses a common task that community users are asking about over and over - how do you specify parameters to a report, and pass a list of valid values for the user to select the parameter from? While there are several ways to do this, we are going to step through one example using the Pentaho Design Studio. The Design Studio eliminates the frustration of writing XML, and should make the parameter passing a bit easier to understand and implement.
For the sake of brevity, I will modify one of the existing samples from the Pentaho pre-configured installation's (PCI) sample solution. Using the JFreeReport HTML sample from the PCI, I will build a page that will prompt the user for which region they would like to report on, give the user a combobox filled with regions to select from, then display the report with the data filtered by the selected region. In this exercise, we demonstrate
- how to set up an input parameter ,
- how to use a default in-memory result-set to provide the list of values that are valid for the input parameter,
- how to map parameter options to "nice " counterparts for display,
- how to modify an existing report to accept the input parameter as part of the report query,
- and how to use a secured filter component to prompt the user for parameter value selection.
Resources Before You Get Started
Once again, be sure you have the following resources. I've listed the version numbers I used; perhaps our community members could post any successes or problems should you try this with other versions or configurations.
- Pentaho Pre-Configured Install, version 1.1.5 build 260 or later
- Pentaho Getting Started Guide, version 1.1.5 build 260 or later
- Pentaho Design Studio or the Action Sequence Eclipse Plugin , version 1.1.5 build 151 or later
- Pentaho Design Studio User's Guide, version 1.1.5 build 151 or later
Step-By-Step: How to Build Your Solution
- The first step in this exercise is to get the Design Studio installed and running on your computer. Refer to the Design Studio User's Guide to accomplish this step.
- You should have the Pentaho sample solution available on your computer. The sample solution comes bundled in the Pentaho Pre-Configured Install. If you haven't yet, unzip the PCI to a location on your computer that you will remember.
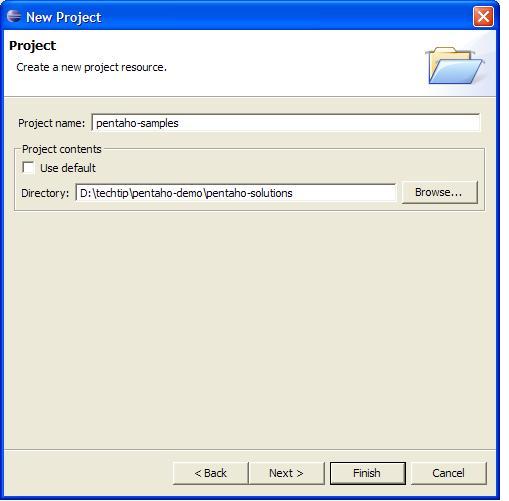
- The common way to work on Pentaho solutions is to set up your solution files as an Eclipse Simple Project. Since we are using the samples as our solution for this exercise, I will create an Eclipse Simple Project called "pentaho-samples", and point to the <pentaho-demo>/pentaho-solutions directory as my project directory.
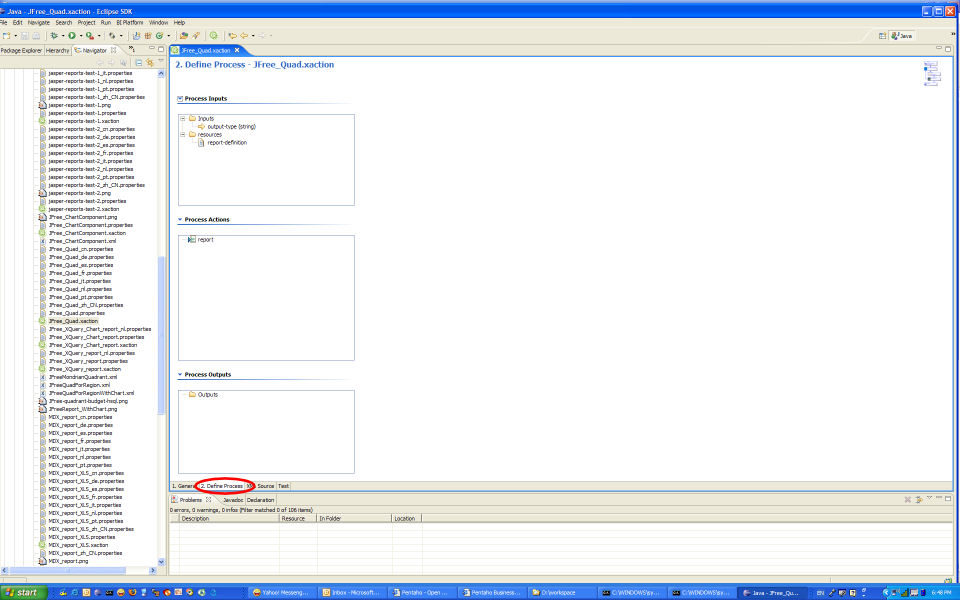
- Once you have your Eclipse project set up, open the file <pentaho-samples>/samples/reporting/JFree_Quad.xaction. This action sequence already builds a JFreeReport. The document will open to the first tab in the Action Sequence Editor, the General tab. NOTE: If you don't want to modify the sample directly, do a Save As..., and name the new file Test_Quad.xaction. The new sample will show up in the PCI as a duplicate of the JFree_Quad sample, but will of course contain your new solution.
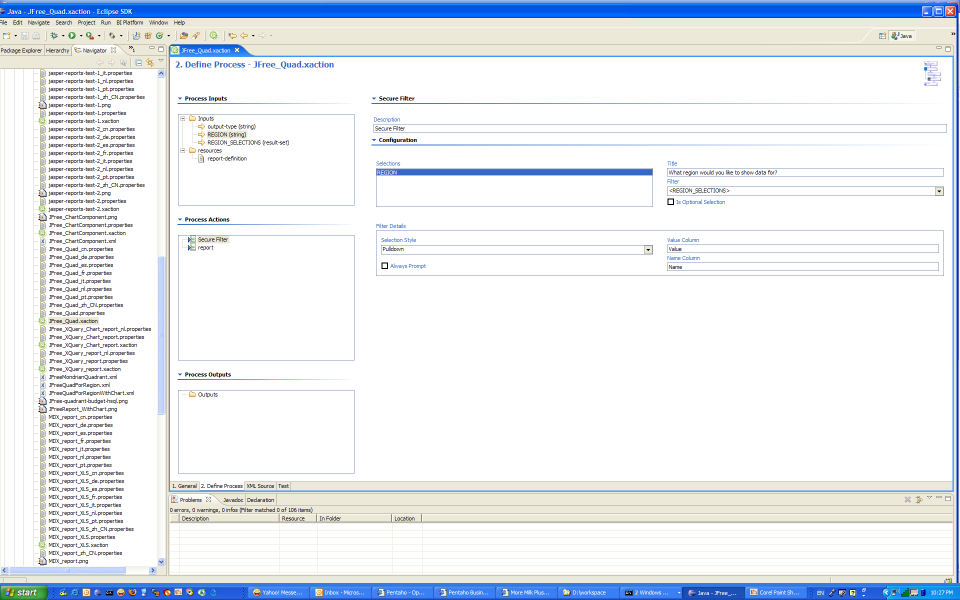
- Switch to the "Step 2. Define Process" tab in the Action Sequence Editor. Here is where the bulk of our work will be done.
Defining the Inputs
At the top of this tab, you should see a Process Inputs box. For our solution we need two process inputs. One is the input that will hold the list of Region values that we want to define. We will call this input REGION_SELECTIONS. We also need an input that will hold the selected Region. We will call this input REGION.
- Right-click on the folder named Inputs in the Process Inputs box. Select Add... | Input from the menu.
- In the new editor page, type REGION in the textbox labeled "Name". Leave the Type defaulted to string.
- Check the box labeled "Has Default Value". Set the default value to Central by typing Central in the text box labeled "Default Value".
- Add another input following the same steps, naming it "REGION_SELECTIONS".
- This time, change the value in the Type combobox to "result-set" by scrolling down in the list of options.
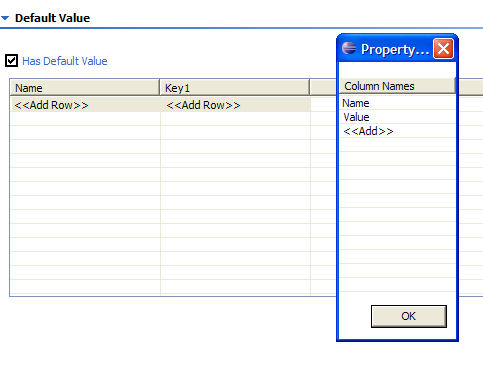
- Once again, select the "Has Default Value" checkbox. You should notice that the dialog has changed for setting the default value. You should see a two column table, columns named key0 and key1.
- Change the name of the columns to Name and Value, in that order. Select the first row in the table, right-click and select the "Manage Columns" option. You will be prompted with a dialog populated with the column names. Rename key0 to Name, and key1 to Value.
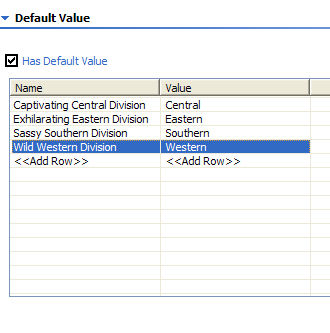
- Now we can enter the list of values that are valid for our REGION parameter. The values we enter in the name column are the descriptions we want to display in the prompt page. The values we enter in the Values column are the corresponding values that are to be passed to the report query. This is very useful when you have, for example, ugly codes that describe your products that you must pass to your query, but you want the descriptive names to be displayed to your users for product selection. Enter the following values in the table:
- Save your action sequence now.
Fleshing Out the Process
Now that we have defined our inputs, we need to perform two more tasks: 1.) associate the REGION input with our report query, and 2.) provide the mechanism for displaying the REGION_SELECTIONS values to our user.
- Click on the "report" entry in the Process-Actions box. You should see the editor page populated with the report definition.
- Locate the report query, halfway down the page. Add the following where clause in the middle of the existing query:
WHERE QUADRANT_ACTUALS.REGION='{REGION}'
- Notice that the {REGION} string shows up as a Report Parameter, just above the query. This is called a replaceable parameter, and in one more step we will associate the value selected from the REGION_SELECTIONS with this replaceable parameter.
- Right click in the Process Actions box. Click on the Add... menu option, then select the Secure Filter. This will add a secure filter component to your action sequence. The secure filter component allows you to filter data by a selected value, and protect your queries by not allowing the URL back to the server to execute with any other values than those provided as options via the component.
- Drag the secure filter component above the report entry in the Process Actions box.
- Select the Secure Filter in the Process Actions box, so that the editor page displays the options for the Secure Filter.
- Drag the REGION Input parameter FROM the Process Inputs box TO the Selections box of the Secure Filter page.
- Next, select REGION in the Selections box.
- A Title and Filter boxes appear. In the Title textbox, add the prompt for the REGION parameter (ie., What region would you like to see data for?).
- In the Filter box, select <REGION_SELECTIONS>. You should note that some new options are now available to you, named Filter Details.
- In Filter Details, change the Selection Style to "pulldown".
- Type "Value" in the text box labeled "Value Column", and type "Name" in the text box labeled "Name Column". Remember these are the names we gave our columns when we were describing our table of values in the REGION_SELECTIONS input parameter.
- Save your action sequence now.
Step-By-Step: How to Test Your Solution
Here is where the Pentaho Pre-configured Install comes in. Follow the steps given to test out your new solution in the server.
- First, make sure your PCI is up and running. If you don't know how to get it started, or are unsure as to whether it's already running, see the Pentaho Getting Started Guide for how to successfully start the server.
- Next make sure that the solution folders you are using in the PCI contains your modified JFree_Quad.xaction!!
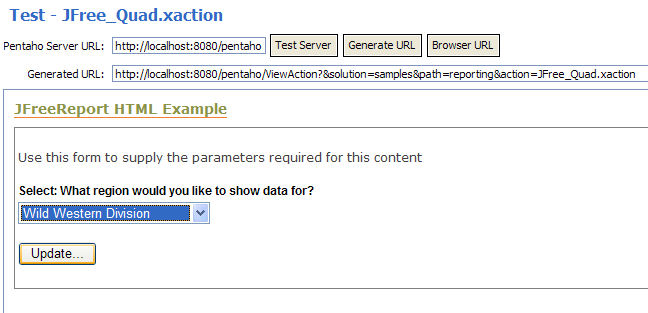
- Switch to the Test tab of the Action Sequence Editor. Verify that the "Server URL" at the top of the page is indeed the URL to your PCI by clicking the "Test Server" button. You will see see the home page of the PCI if all is operating properly.
- You should see the URL for the action sequence we want to test in the textbox labeled "Generated URL". Just after that text box is a "Run" button.
- Click the "Run" button to test your action sequence. You should see a prompt page asking for the region. When you select submit, you will recieve your report filtered down to the region you selected.
Should you encounter any problems or if you just want to peruse the solution, you can find the xml for this exercise here.