Using Pentaho MapReduce to Generate an Aggregate Dataset
How to use Pentaho MapReduce to transform and summarize detailed data into an aggregate dataset. It is a common use case when preparing data for extraction to an RDBMS-based data warehouse or mart. You will use parsed weblog data as the details and build an aggregate file containing a count of page views by IP address and month.
The steps in this guide include
- Loading the sample data file into HDFS
- Developing a PDI transformation which will serve as a Mapper
- Developing a PDI transformation which will serve as a Reducer
- Developing a PDI job which will invoke a Pentaho MapReduce step that runs MapReduce using the developed mapper and reducer transformation.
- Executing and reviewing output
Prerequisites
In order follow along with this how-to guide you will need the following:
- Hadoop
- Pentaho Data Integration
- Pentaho Hadoop Node Distribution
Sample Files
The sample data file needed for this guide is:
File Name |
Content |
Tab-delimited, parsed weblog data |
NOTE: If you have completed the Using Pentaho MapReduce to Parse Weblog Data guide, then the necessary files will already be in the proper location.
This file should be placed into HDFS at /user/pdi/weblogs/parse using the following commands:
hadoop fs -mkdir /user/pdi/weblogs
hadoop fs -mkdir /user/pdi/weblogs/parse
hadoop fs -put weblogs_parse.txt /user/pdi/weblogs/parse/
Step-By-Step Instructions
Setup
Start Hadoop if it is not already running.
Create a Pentaho Mapper Transformation
In this task you will create a Pentaho Mapper transformation. This transformation will be used to run a Pentaho MapReduce job on the Hadoop cluster. This transformation will consume a parsed, tab-delimited weblog record and construct intermediate data consisting of a key comprised of Client IP, Year, and Month and emitting a constant value of 1. The value denotes a single pageview for the key. The summing will be done by the Reducer – which we will develop next.
- Start PDI on your desktop. Once it is running choose 'File' -> 'New' -> 'Transformation' from the menu system or click on the 'New file' icon on the toolbar and choose the 'Transformation' option.
Speed Tip
You can download the Kettle Transform aggregate_mapper.ktr already completed
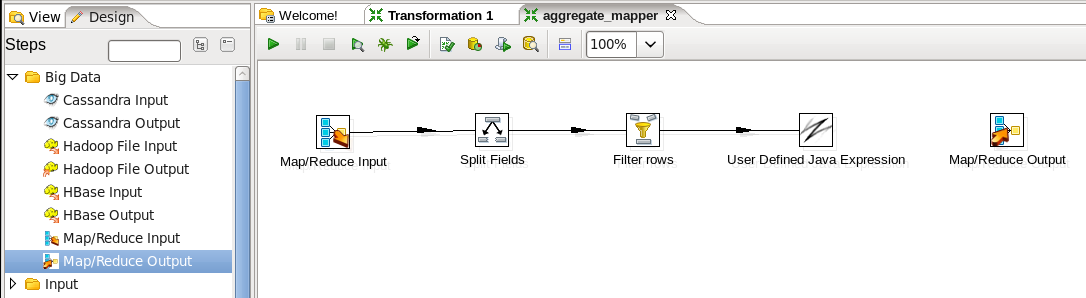
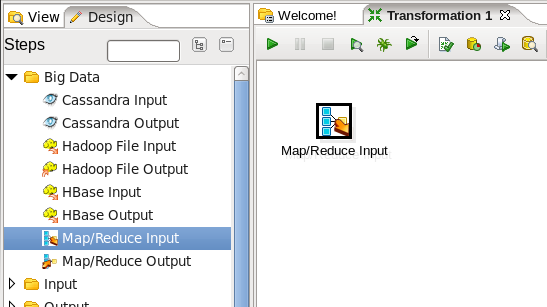
- Add a MapReduce Input Step: You are going to read data into the transformation from MapReduce, so expand the 'Big Data' section of the Design palette and drag a 'MapReduce Input' node onto the transformation canvas. Your transformation should look like:

- Edit the MapReduce Input Step: Double-click on the 'MapReduce Input' node to edit its properties. Enter this information:
- Key Field Type: Enter String
- Value Field Type: Enter String
When you are done your 'MapReduce Input' window should look like this:

Click 'OK' to close the window.
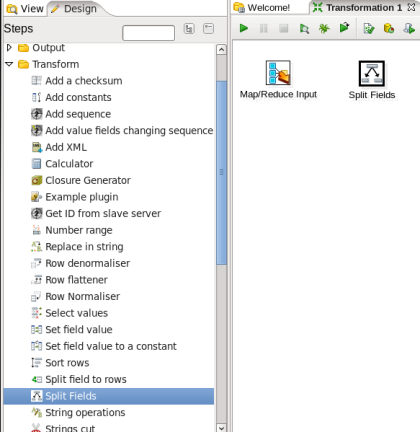
- Add a Split Fields Step: You need to split the incoming records on tab to get the individual fields in the record, so expand the 'Transform' section of the Design palette and drag a 'Split Fields' node onto the transformation canvas. Your transformation should look like:
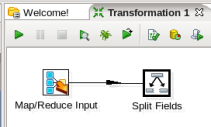
- Connect the Input and Split Fields Steps: Hover the mouse over the 'MapReduce Input' node and a tooltip will appear.

Click on the output connector (the green arrow pointing to the right) and drag a connector arrow to the 'Split Fields' node. Your canvas should look like this:
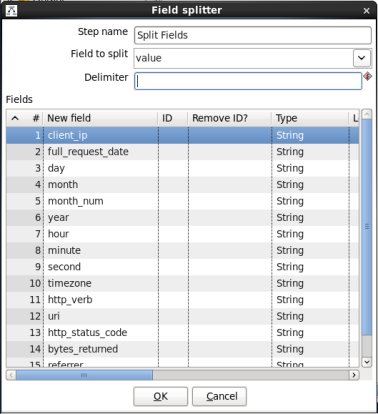
- Edit the Split Fields Step: Double-click on the 'Split Fields' node to edit its properties. Enter this information:
- Field to split: Select 'value'
- Delimiter: Enter '$[09]' 09 is the hexadecimal representation of the ASCII tab character.
- Fields: The field list will be the following of with 'Type' set to 'String'
- client_ip
- full_request_date
- day
- month
- month_num
- year
- hour
- minute
- second
- timezone
- http_verb
- uri
- http_status_code
- bytes_returned
- referrer
- user_agent
When you are done your 'MapReduce Input' window should look like this:
Click 'OK' to close the window.
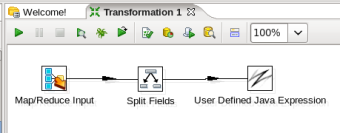
- Add a User Defined Java Expression Step: You need to concatenate the client_ip, year, and month together to create the key field, so expand the 'Scripting' section of the Design palette and drag a 'User Defined Java Expression' node onto the transformation canvas. Your transformation should look like:
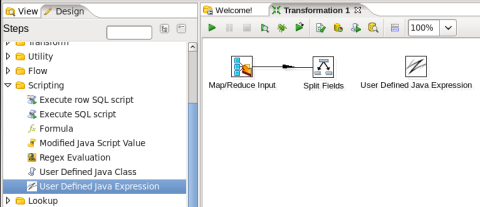
- Connect the Split Fields and User Defined Java Expression Steps: Hover the mouse over the 'Split Fields' node and a tooltip will appear. Click on the output connector (the green arrow pointing to the right) and drag a connector arrow to the 'User Defined Java Expression' node. Your canvas should look like this:
- Edit the User Defined Java Expression Step: Double-click on the 'User Defined Java Expression' node to edit its properties. Do the following:
- Create a new field 'new_key' with Type 'String' and the following Java expression:
Note the characters between the '' are tabs. You will have to copy and paste tab characters into the Java Expression.client_ip + '\t' + year + '\t' + month_num
- Create a new field 'new_value' with Type 'Integer' and the Java expression '1'.
When you are done your window should look like:
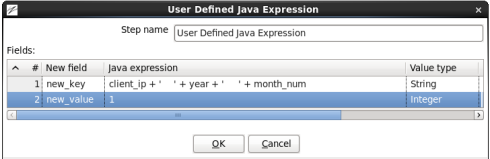
Click 'OK' to close the window.
- Create a new field 'new_key' with Type 'String' and the following Java expression:
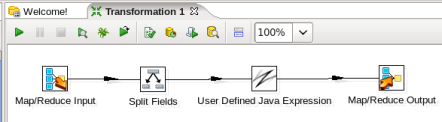
- Add a MapReduce Output Step: You need to write the new key and new value to the output, so expand the 'Big Data' section of the Design palette and drag a 'MapReduce Output' node onto the transformation canvas. Your transformation should look like:
- Connect the Java Expression and Output Steps: Hover the mouse over the 'User Defined Java Expression' node and a tooltip will appear. Click on the output connector (the green arrow pointing to the right) and drag a connector arrow to the 'MapReduce Output' node. Your canvas should look like this:
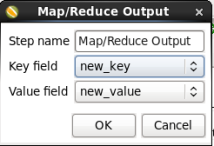
- Edit the Output Step: Double-click on the 'MapReduce Output' node to edit its properties. Enter the following information:
- Key field: Select 'new_key'
- Value field: Select 'new_value'
When you are done your window should look like:
Click 'OK' to close the window.
- Save the Transformation: Choose 'File' -> 'Save as...' from the menu system. Save the transformation as 'aggregate_mapper.ktr' into a folder of your choice.
Create a Pentaho Reducer Transformation
In this task you will create a Pentaho reducer transformation. It will consume the output of the mapper you just created and emit the same key while summing the values. The emitted value will be the count of pageviews for the key. Note that we do not need to do any sorting in this transformation since we can rely on the MapReduce engine's sort and shuffle process to ensure that the reducer receive records sorted in key order.
- Start PDI on your desktop. Once it is running choose 'File' -> 'New' -> 'Transformation' from the menu system or click on the 'New file' icon on the toolbar and choose the 'Transformation' option.
Speed Tip
You can download the Kettle Transform aggregate_reducer.ktr already completed
- Add a MapReduce Input Step: You are going to read data into the transformation from MapReduce, so expand the 'Big Data' section of the Design palette and drag a 'MapReduce Input' node onto the transformation canvas. Your transformation should look like:
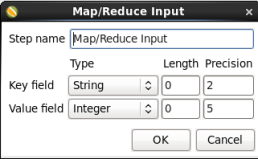
- Edit the MapReduce Input Step: Double-click on the 'MapReduce Input' node to edit its properties. Enter this information:
- Key Field Type: Enter 'String'
- Value Field Type: Enter 'Integer'
When you are done your 'MapReduce Input' window should look like this:
Click 'OK' to close the window.
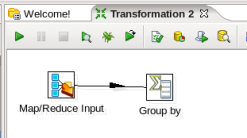
- Add a Group By Step: You are going to sum the values for each key, so expand the 'Statistics' section of the Design palette and drag a 'Group by' node onto the transformation canvas. Your transformation should look like:
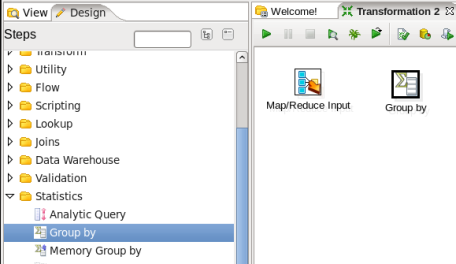
- Connect the Input and Group By Steps: Hover the mouse over the 'MapReduce Input' node and a tooltip will appear. Click on the output connector (the green arrow pointing to the right) and drag a connector arrow to the 'Group by' node. Your canvas should look like this:
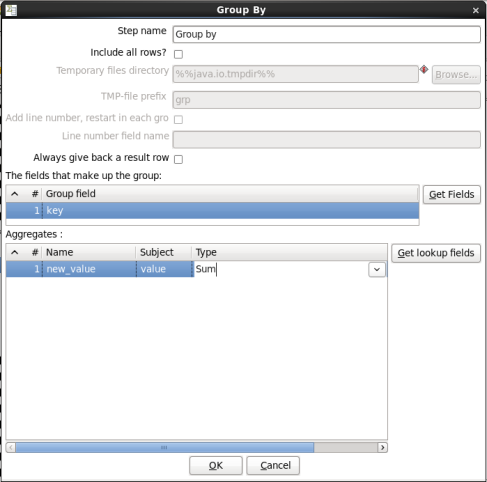
- Edit the Group By Step: Double-click on the 'Group by' node to edit its properties. Enter this information:
- Group field: Enter 'key'
- Aggregates: Enter the following:
- Name: Enter 'new_value'
- Subject: Enter 'value'
- Type: Select 'Sum'
When you are done your window should look like this:
Click 'OK' to close the window.
- Add a MapReduce Output Step: You need to write the new key and new value to the output, so expand the 'Big Data' section of the Design palette and drag a 'MapReduce Output' node onto the transformation canvas. Your transformation should look like:
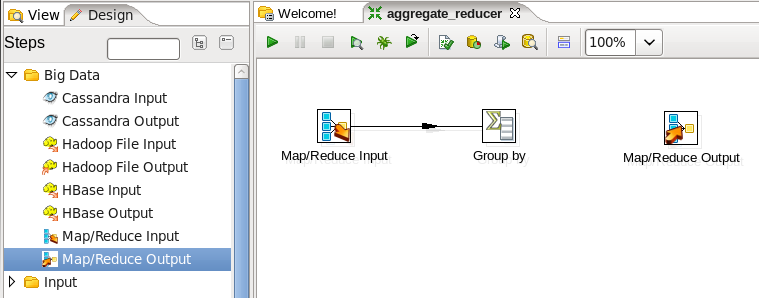
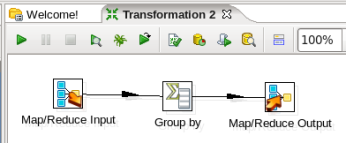
- Connect the Group By and Output steps: Hover the mouse over the 'Group by' node and a tooltip will appear. Click on the output connector (the green arrow pointing to the right) and drag a connector arrow to the 'MapReduce Output' node. Your canvas should look like this:
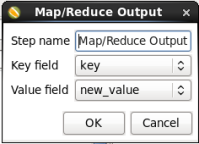
- Edit the Output Step: Double-click on the 'MapReduce Output' node to edit its properties. Enter the following information:
- Key field: Select 'key'
- Value field: Select 'new_value'
When you are done your window should look like:
Click 'OK' to close the window.
- Save the Transformation: Choose 'File' -> 'Save as...' from the menu system. Save the transformation as 'aggregate_reducer.ktr' into a folder of your choice.
Create a Job to Execute a MapReduce Process
In this task you will create a job that will execute a MapReduce process that runs the newly created mapper and reducer transformations.
- Start PDI on your desktop. Once it is running choose 'File' -> 'New' -> 'Job' from the menu system or click on the 'New file' icon on the toolbar and choose the 'Job' option.
Speed Tip
You can download the Kettle Job aggregate_mr.kjb already completed
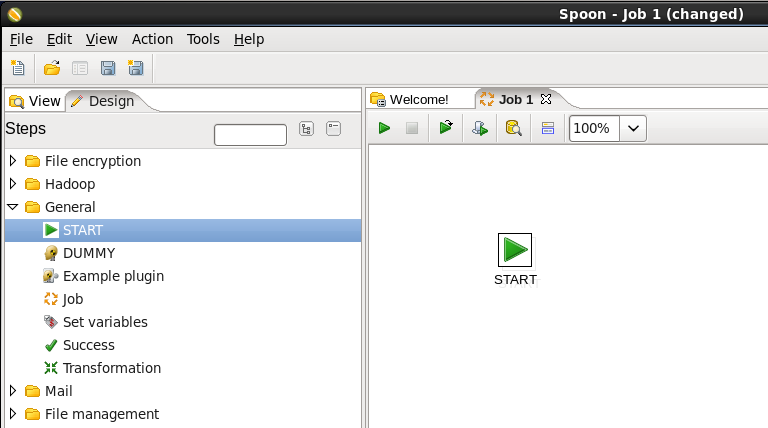
- Add a Start Job Entry: You need to tell PDI where to start the job, so expand the 'General' section of the Design palette and drag a 'Start' node onto the job canvas. Your canvas should look like:
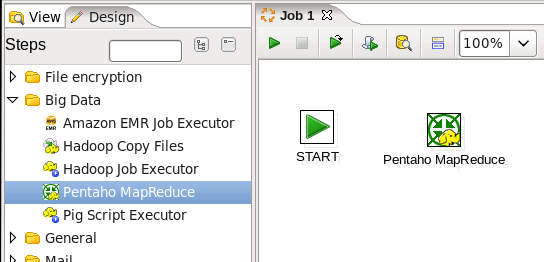
- Add a Pentaho Map Reduce Job Entry: You are creating the job to execute a Pentaho MapReduce transformation, so expand the 'Big Data' section of the Design palette and drag a 'Pentaho MapReduce' node onto the job canvas. Your canvas should look like:
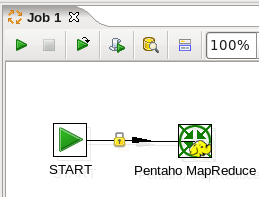
- Connect the Start and MapReduce Job Entries: Hover the mouse over the 'Start' node and a tooltip will appear. Click on the output connector (the green arrow pointing to the right) and drag a connector arrow to the 'Pentaho MapReduce' node.
Your canvas should look like this:
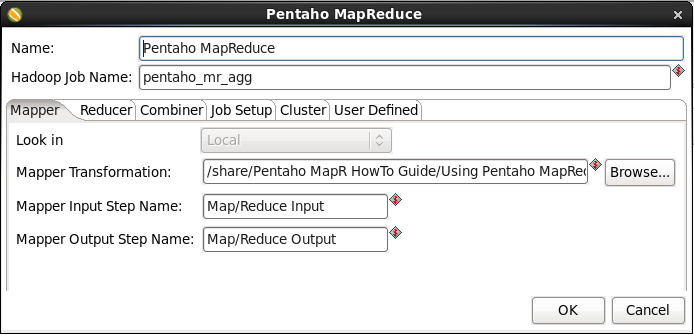
- Edit the MapReduce Job Entry: Double-click on the 'Pentaho MapReduce' node to edit its properties. Enter this information:
- Hadoop Job Name: Enter 'Aggregate Map Reduce'
- Mapper Transformation: Enter <PATH>/aggregate_mapper.ktr
<PATH> is the folder path you saved the mapper in. - Mapper Input Step Name: Enter 'Map/Reduce Input'
- Mapper Output Step Name: Enter 'Map/Reduce Output'
When you are done the window should look like:
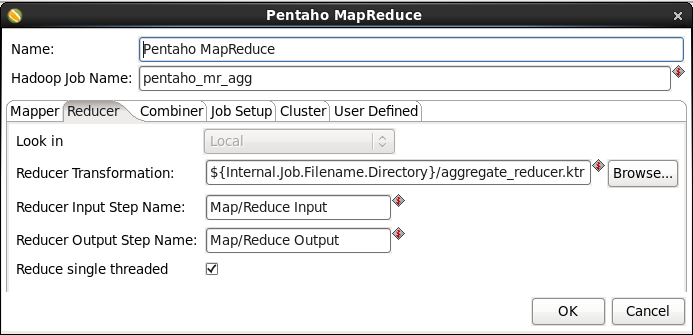
- Configure the Reducer: Switch to the 'Reducer' tab and enter the following:
- Reducer Transformation: Enter <PATH>/aggregate_reducer.ktr
- Reducer Input Step Name: Enter 'Map/Reduce Input'
- Reducer Output Step Name: Enter 'Map/Reduce Output'
When you are done the window should look like:
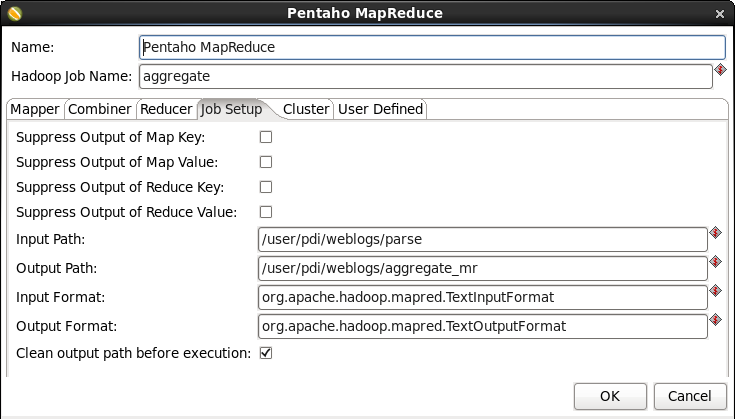
- Configure the MapReduce Job: Switch to the 'Job Setup' tab. Enter this information:
- Input Path: Enter '/user/pdi/weblogs/parse'
- Output Path: Enter '/user/pdi/weblogs/aggregate_mr'
- Input Format: Enter 'org.apache.hadoop.mapred.TextInputFormat'
- Output Format: Enter 'org.apache.hadoop.mapred.TextOutputFormat'
- Check 'Clean output path before execution'
When you are done your window should look like:
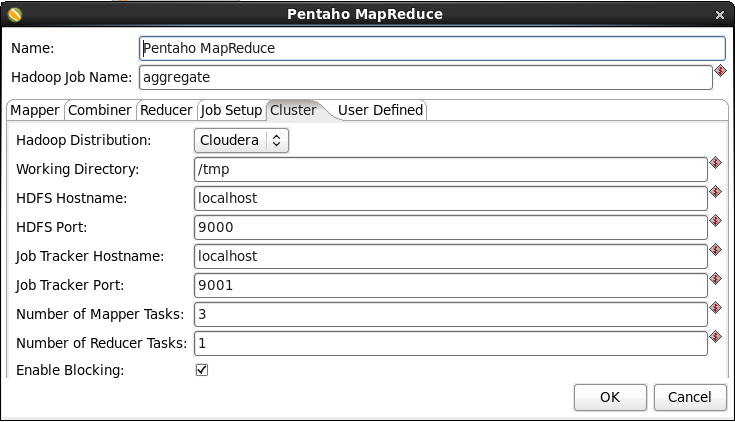
- Configure the Cluster Properties: Switch to the 'Cluster' tab. Enter this information:
- Hadoop distribution: Select your Hadoop distribution
- Working Directory: Enter '/tmp'
- HDFS Hostname, HDFS Port, Job Tracker Hostname, Job Tracker Port: Your connection information.
- Number of Mapper Tasks: Enter '3'. You can play around with this to get the best performance based on the size of your data and the number of nodes in your cluster.
- Number of Reducer Tasks: Enter '1'. You can play around with this to get the best performance based on the size of your data and the number of nodes in your cluster.
- Check 'Enable Blocking'
- Logging Interval: Enter '10'. The number of seconds between pinging Hadoop for completion status messages
When you are done your window should look like:
Click 'OK' to close the window.
- Save the Job: Choose 'File' -> 'Save as...' from the menu system. Save the transformation as 'aggregate_mr.kjb' into a folder of your choice.
- Run the Job: Choose 'Action' -> 'Run' from the menu system or click on the green run button on the job toolbar. A 'Execute a job' window will open. Click on the 'Launch' button. An 'Execution Results' panel will open at the bottom of the PDI window and it will show you the progress of the job as it runs. After a few seconds the job should finish successfully:

If any errors occurred the job step that failed will be highlighted in red and you can use the 'Logging' tab to view error messages.
Check Hadoop for Aggregated Web Log
- Run the following command to view the aggregated results:
hadoop fs -cat /user/pdi/weblogs/aggregate_mr/part-00000 | head
This should return the first few rows of the aggregated file.
Summary
During this guide you learned how to create and execute a Pentaho MapReduce job on a Hadoop cluster. You consumed detailed weblog data and generated an aggregate datafile which is suitable for load into an RDBMS-based data warehouse or mart.